
Each content type in our website has a different set of fields and we therefore have a separate help page for each of them. However, there are a number of operations and tips that are common to all content types and these are dealt with by this help page.
The 'Creator help' menu
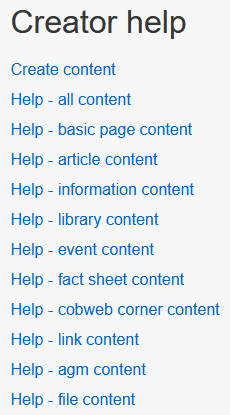
If you are not logged into the website, then the creator help menu will not be visible, but if you are logged in and an admin has given your account a role which allows creation/editing of one or more content types, then you will see this menu on the right of the home page.
Use the first item in this list to start creating a new item of a given content type (henceforth referred to as a 'page'). If your role allows creation of more than one content type, then this link will take you to a page where you select the type of content you want to create. If your role only allows creation of one content type, then the link takes you straight to a new page of that content type.
The 'My content' list
If you are not logged into the website, then the my content list will not be visible, but if you are logged in and an admin has given your account a role which allows creation/editing of one or more content types, then you will see this list underneath the creator help menu on the right of the home page.
This list will include all content you have created - whether or not it is published - so it is a convenient way of find a page that you have been working on.
Editing existing content
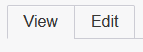
If you want to edit an existing page, first go to that page. If you have the role required to edit it, in most cases you will see tabs like these at the top of the page. To edit, click the edit tab. The page will be presented in an editable form. For each content type, this is exactly the same form as you would see if you were creating new content. The only difference is that when you edit, the various fields are already populated with the existing content.
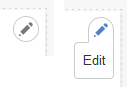
For some content types, e g. cobweb corner and fact sheet, you can only view the content in a grid layout and, for these, you will not see the view/edit tabs. Instead, you can use the quick edit link which is visible when you place your mouse cursor over the content. When you do that you will first see the pencil icon as shown. When you click on the pencil you will see the edit link. Click on the edit link to edit the page. (This method of opening content in an editor is available on all content types.)
Saving (draft and published)
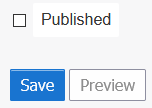
When you have either created a new page, or edited an existing one, save it by clicking the save button at the bottom of the editor. If you are saving a page but do not want to publish it to a wider audience just yet, make sure that the published checkbox is not ticked checked. This allows you to save a draft and return to work on it at a later date. This can be really useful for new content, but normally when you are editing an existing page, you will just leave this box checked.
When you are ready to publish the page, make sure that the checkbox is checked before saving it.
Ignore the preview button - this is not working.
Using revision history
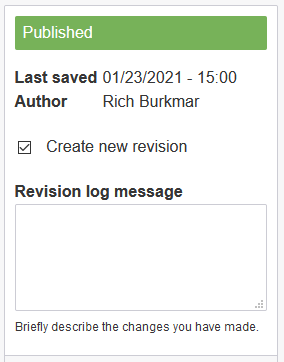
Whenever you save a page, Drupal keeps track of that 'revision'. This is useful if you ever want to revert to a previous revision. Please note that you do not have to use any of the revision features described in this section - so you can afford to ignore this section if you like.
When you edit content you will see a revision box on the right of the screen. Keep the create new revision checkbox checked so that Drupal automatically saves revision information whenever you use the save button. The revision log message is optional - it is only there to help you locate particuarly useful revision points.
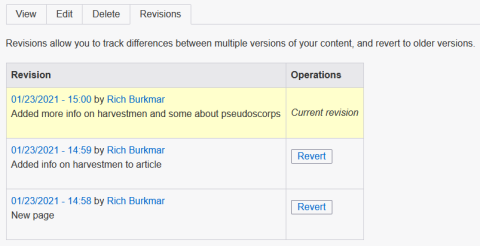
To inpect previous revisions and, optionally revert back to one, look for and select the revision tab at the top of the page. You will see something like the example below. You can see the date and the author of each revision together with any revision log message they specified. To revert to a previous revision, just click the revert button adjacent to the revision.
Specifying a URL alias
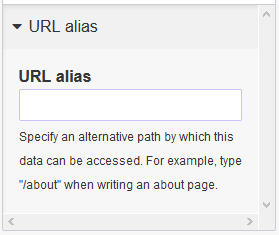
When you create new a new page - known in Drupal as a 'node' - it is given a unique number reference at the URL (web address) of the page you create is based on that node. It will look something like: http://www.britishspiders.org.uk/node/26755 (look at the address bar in your browser after you have saved the page). But often you will want to specify an alternative, more memorable URL. This is especially true if you want to link to the page from elsewhere in the website or from social media for example. To specify an alternative URL, look for the URL alias link below the revision box on the right of the editor. Expand this by clicking on it and you will see something like that shown here.
To provide a new alias, enter it into the URL alias box and then save your page. Your alias should start with a forward slash. To be consistent with our house style:
- don't use spaces or underscores in the alias
- use hyphens instead of spaces
- don't use uppercase
- try to keep it short.
Some examples of existing URL aliases:
- /join
- /history-and-objectives
- /lockdown-survey-3
- /help-all-content
Mandatory fields
With all content types, there are a number of 'fields' for you to complete before saving. Some of these fields are marked with a red asterisk next to their name. These are mandatory fields and you will not be able to save your page, even in draft form, before supplying a value for them. A good example of a mandatory field is the title field, which is present in all content types.
If you don't know the exact value you want to use for a mandatory field before saving your first draft, just use any value - you can always edit it later.
Editing the body field
Several content types - especially the 'wordy' ones like basic pages and articles - include a body field which is where the majority of the words go. This content type has a number of editing widgets familiar to anyone who has used Microsft Word or any one of many hundreds of other editors. I don't propose to go through them all here - if you have any problems with them, just contact the wemaster for help.

Only a limited number of editing tools are available. This helps us to ensure that new content conforms to our basic house style. So, for example, there are no tools here for changing the colour of text. In the very rare instances where this is desired and advisable, contact the webmaster for help.
The format drop-down allows you format sub-headers on the page. The page will always use the page title as the main header. Normally Heading 1 and Heading 2 should not be used - they are too large for our house style. You are strongly urged to use only the following formats within the body of your page in order to conform to our house style. The image on the right shows how these appear in the editor.
- Heading 3
- Heading 4
Heading 3 can be used to sub-divide your page into major sections. On the saved page, Header 3 text is displayed in a coloured bar (the coloured bar will not appear in the editor).
Underneath the editor is a text format selector. You should ensure that this is set to Full HTML.
Adding images to the body field
For some content types, e.g. basic pages and articles, you can add images into the body field of the edit form. These are the instructions for inserting images into the body field.

Place your mouse cursor at the begining of the line at the point in the document where you want the image to appear and click the insert from media library button (the rather plain-looking square).
That will open the media dialog box shown here.
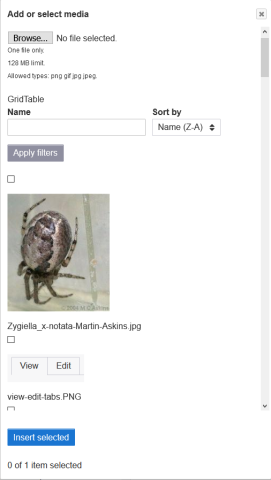
Very often there may already be an image in the media library that suits your needs. You can use this dialog to browse for existing images. To help you do that you can sort on the image name (use the sort by control) or filter on the image name (enter a text filter in the name field). Once you've selected the sort mode or search string, click the apply filters button. Use the scroll-bar on the right of the dialog and the paging controls at the bottom to scroll through the images.
If your find a suitable image, all you need do is check the box above it and click the insert selected button.
If you do not find a suitable image and want to upload one from your computer, use the browse button to find and select the image from your computer.
When you do that you will get a dialog similar to that shown below.
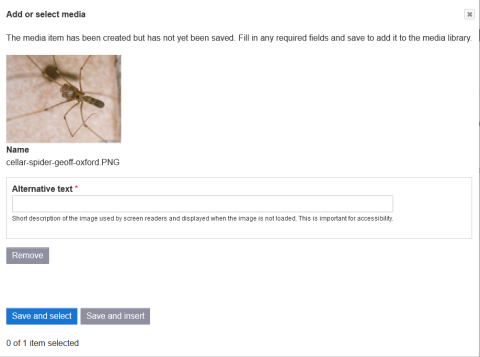
Notice the name given to the image (as stored on the local computer) in this example. By being so descriptive in the image name, it is easier to re-find this image on the media library if it ever needs to be used again later.
You don't have the opportunity to change the name of the image as it is stored on Drupal, so make sure that the image you want to upload has a good descriptive name on your computer before you do the upload.
You have to specify a value for alternative text - this is an internet standard that helps people with visual problems understand web pages.
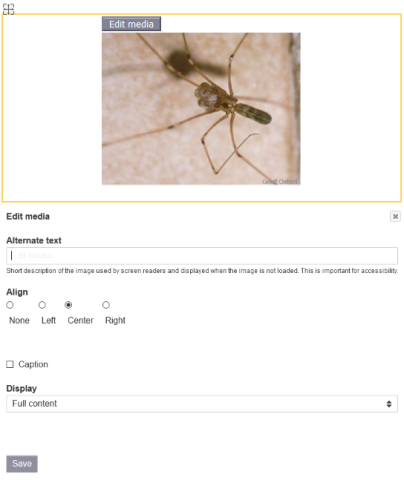
Once you've specified the alternative text, you can click the save and insert button which both saves the image to the media library and inserts it into your page. You will then see something like this on your page. Click the edit media button and you will see another dialog like the one below.
In the edit media dialog, you can override the alternate text if you wish with something different (perhaps more informative in the context of your page). You can also choose how the image is to be aligned on the page, e.g. on the left or right.
If you check the caption checkbox, you will be able to add a caption to the image from your edit page.
Under the display dropdown, you can select an option to set the size of your image. If your image is smallish, you may be able to get away with full content. But if the image is large, you may want to select the w300 option which will resize to 300 pixels. If a suitable display size option is not present, contact the webmaster.